
How to Create a Google Form on iPhone (Step by Step)
Yassine Jaa 8 minute read
There is no Google Forms app for iPhone, so “create a Google Form on iPhone” means one thing: Safari. That is less of a compromise than it sounds. I built the form in this guide on my iPhone on 15 September 2026, and every screen below is a screenshot from that session, not a desktop screenshot squeezed to phone width. If you want the longer story of what the mobile editor does well and badly, it is in Using Google Forms on a phone. This page is just the steps.
You need a Google account and about ten minutes for a form of four or five questions. Longer forms are possible; I explain at the end why I would not.
1. Open a new form
Type forms.new in Safari’s address bar. It is a real Google shortcut, and it skips the forms list entirely: you land in a blank, untitled form, already signed in if Safari knows your Google account. If it asks you to sign in first, do that and the form appears after.
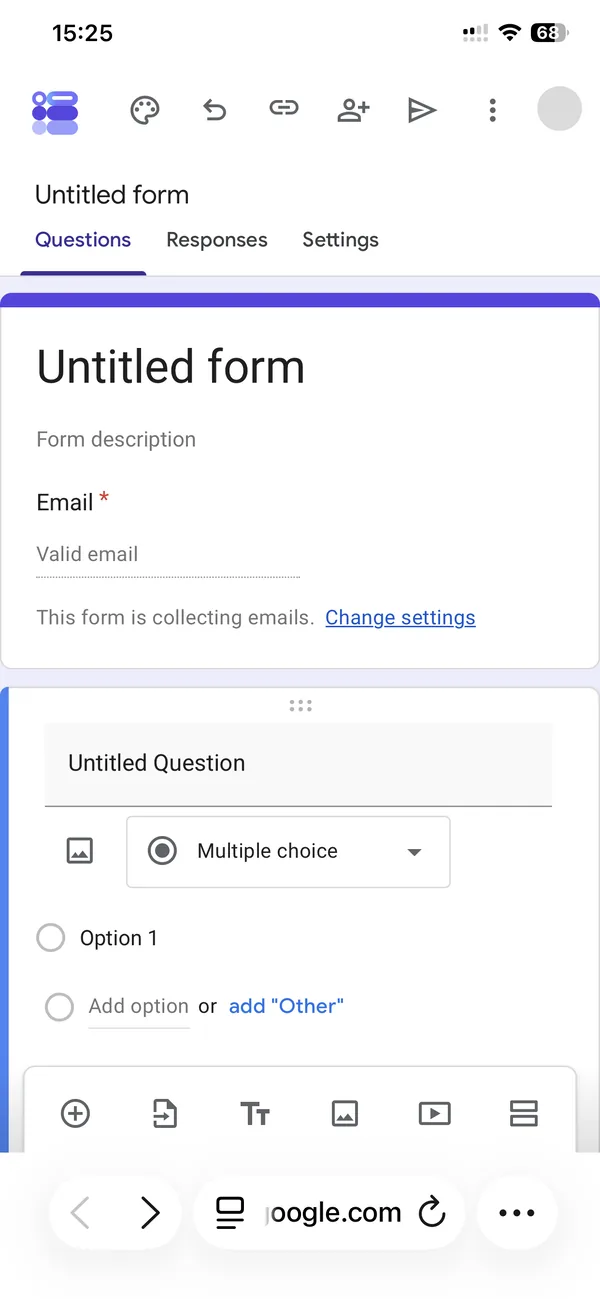
Two things to check on this first screen before you type anything. The form title is the “Untitled form” text at the top of the purple card; tap it to rename it, and rename it now, because the file in your Drive takes the same name. And look for the line “This form is collecting emails”. On my phone it was on by default. If your respondents should stay anonymous, tap “Change settings” next to it and switch email collection off.
2. Add your questions
A blank form comes with one empty question. Tap the “Untitled Question” text and type your question. Below it, the box that says “Multiple choice” is the type picker.
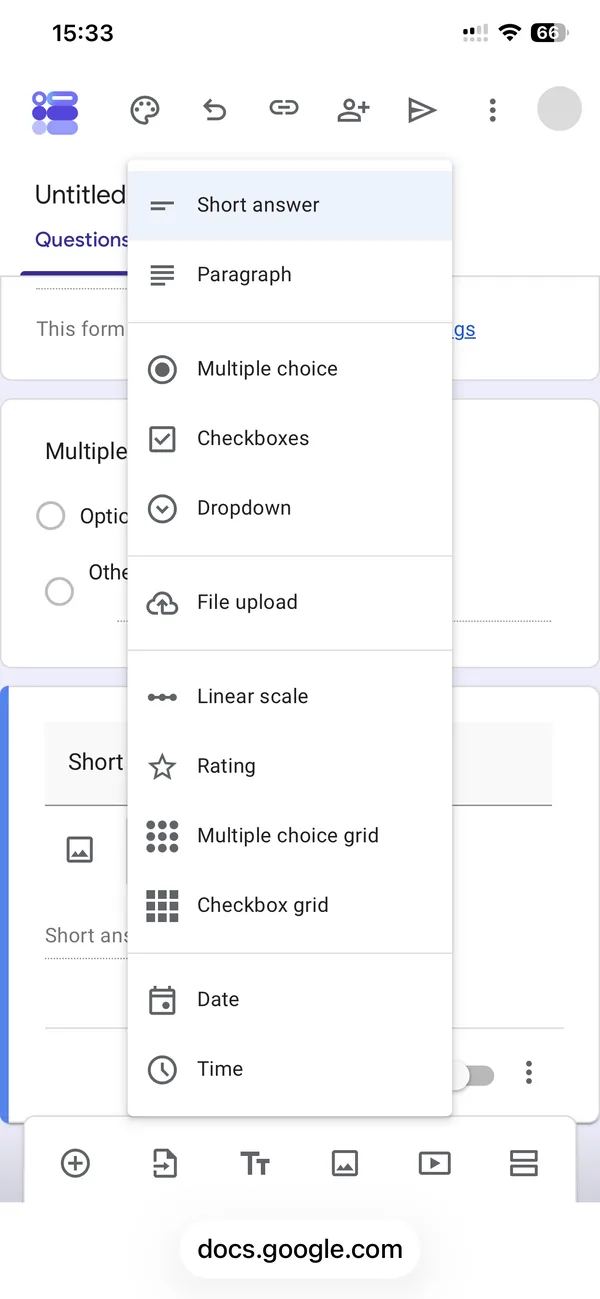
The picker opens as a tall list over the page. Short answer is for names and one-line replies, Paragraph for anything longer, Multiple choice when only one answer is right, Checkboxes when several can be. Dropdown is Multiple choice that takes less space, which matters on a phone with a long list of options. The two grids and the two scales are there too, and so is Rating, which gives stars.
To add the next question, tap the plus icon, the first one in the bottom toolbar. The new question appears under the one you were editing. Repeat until you have them all.
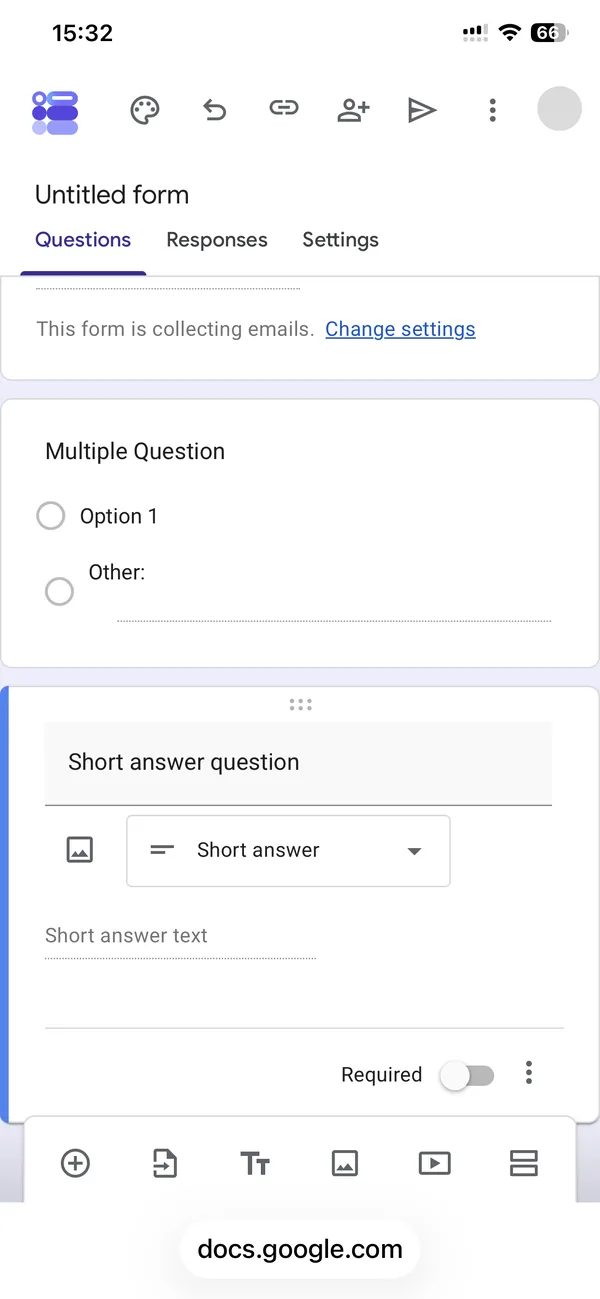
One habit that saves time on a phone: write the question, pick the type, set Required, and only then move to the next card. Going back to a card later means tapping it to select it again, and the keyboard covering half the screen makes that slower than it should be. That is where most of my minutes went on the day.
If you tap outside a card while scrolling, Google Forms deselects it and its controls fold away. Nothing is lost; tap the card again.
3. Set the look
The palette icon in the top bar opens the Theme panel. You can skip this step, and for an internal form I usually do. For anything a customer or a parent will see, thirty seconds here is worth it.
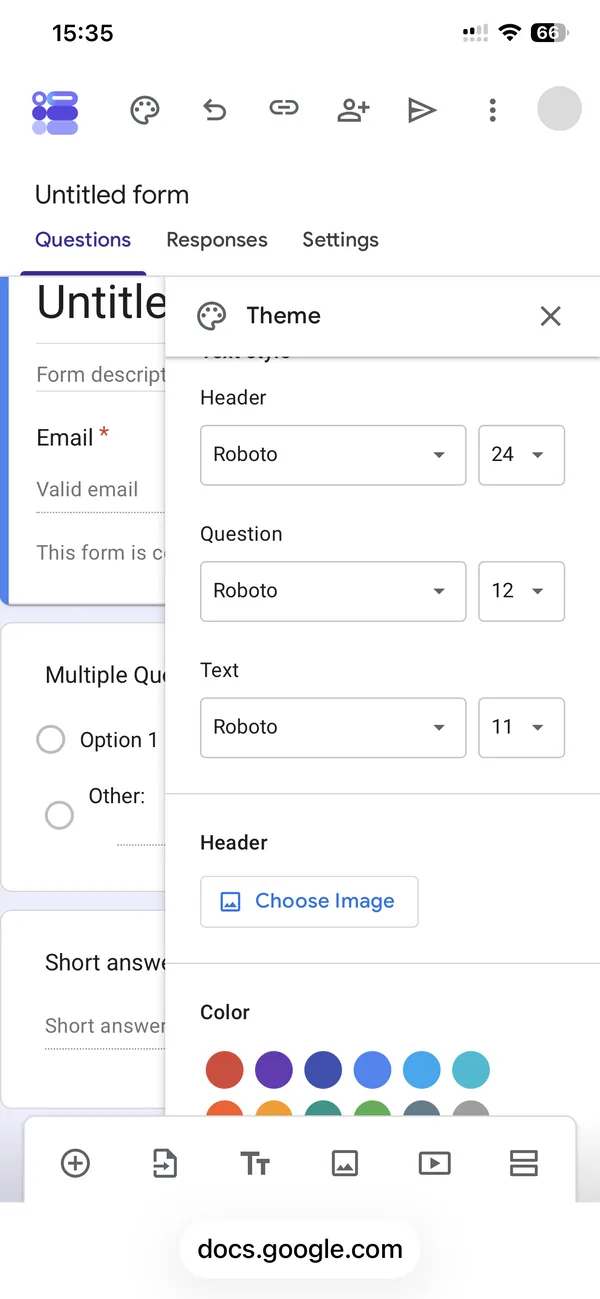
The Theme panel
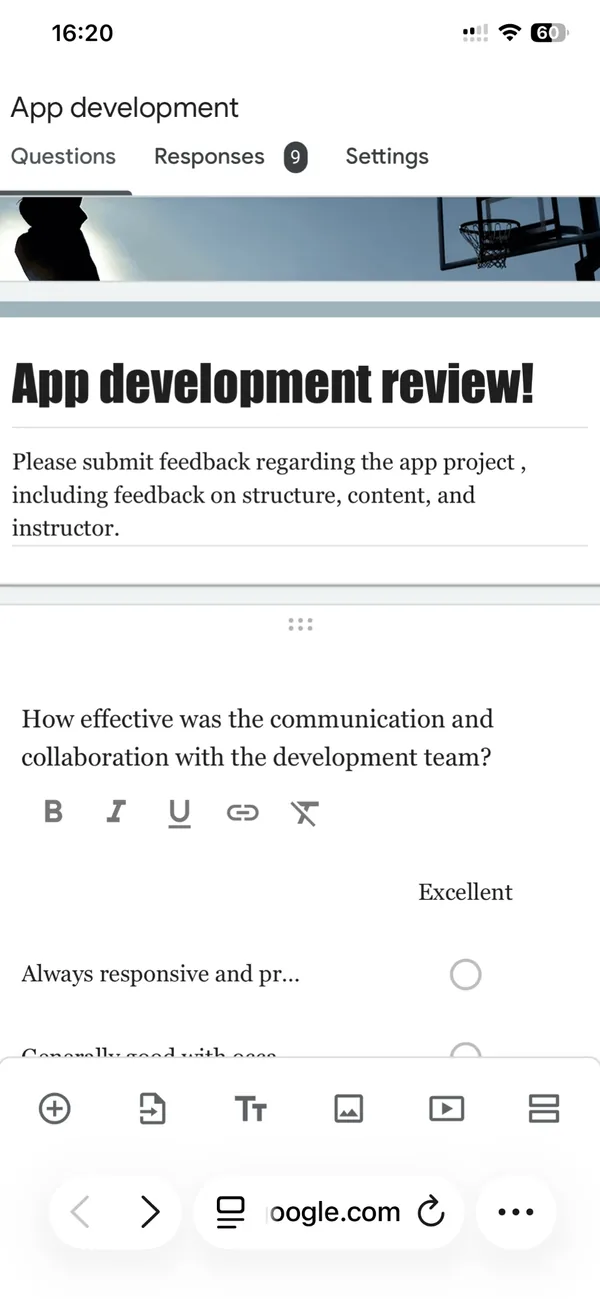
A form themed entirely from the phone
Fonts and sizes for the header, the questions and the body text are separate dropdowns. The colour grid changes the header bar and the buttons. The header image is the one setting I would prepare on a computer if it matters, because Google crops whatever you choose to a wide 4:1 strip and the crop is hard to control on a small screen. Our header image maker exports the exact 1600 by 400 pixel size, so the crop has nothing to cut; you can use it on the phone too.
4. Check the settings
The Settings tab is the third one at the top. Three things live there that you may want before you publish: “Make this a quiz” if the form is graded, the email collection setting I mentioned in step 1, and “Limit to 1 response”, which forces respondents to sign in to Google and stops one person answering twice. Leave that one off for public forms; it turns away anyone without a Google account.
5. Publish and copy the link
This is the step that older guides get wrong, because Google changed it. There is no “Send” button now. The icon at the right of the top bar opens a dialog called “Published options”.
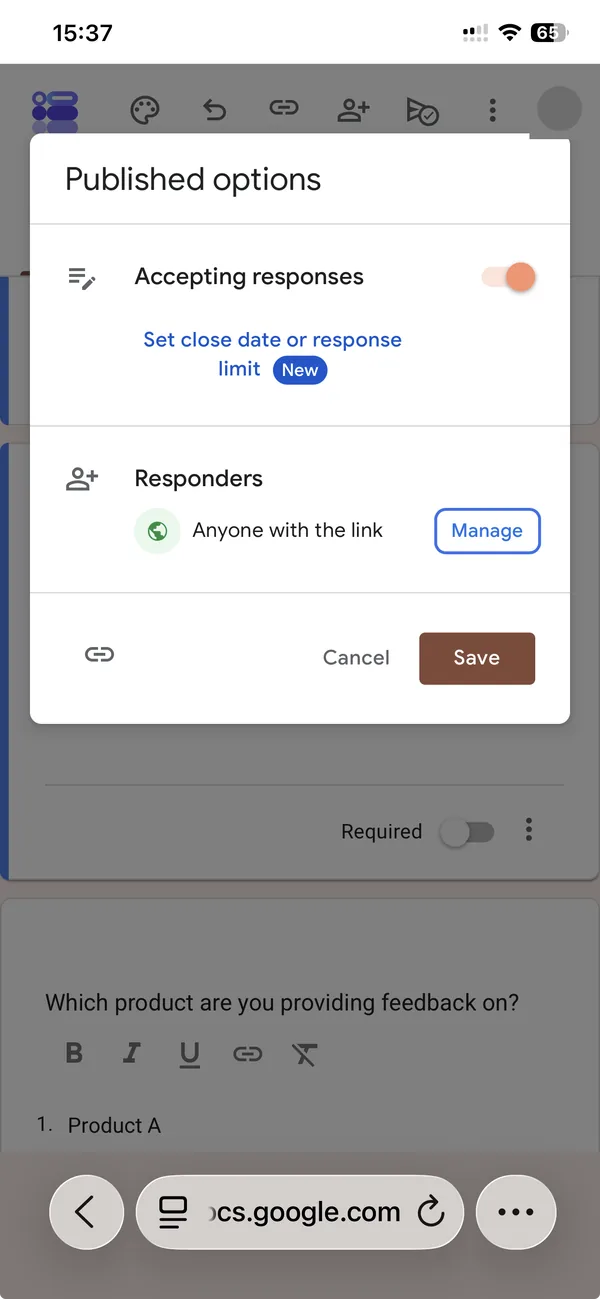
Check that “Accepting responses” is on and that Responders says “Anyone with the link” (tap Manage to restrict it to your organisation if you have one). If you need the form to close itself, “Set close date or response limit” does that; it is new, and it replaces the scripts people used to need. Tap Save.
Then the part that is easy to miss: the form’s address is behind the small link icon in the bottom-left corner of that same dialog. There is no button labelled “Copy link”. Tap the icon, and the URL is on your clipboard, ready for Messages, WhatsApp or an email.
If you want a QR code instead, for a poster or a screen, Google Forms does not make one. Paste the link into our QR code generator; it runs in the browser and works on the phone.
6. Test it before you share it
Open the link you just copied in a new Safari tab and answer the form yourself. You are checking three things: that every Required question is actually the one you meant, that the dropdown options are in the order you want, and that the confirmation message at the end says something sensible. It takes a minute and it catches the mistake that the first ten real respondents would otherwise catch for you.
7. Read the responses
Back in the editor, the Responses tab shows a count in the tab itself as answers arrive. The Summary view has the charts, Question shows one question at a time, Individual walks through each respondent.
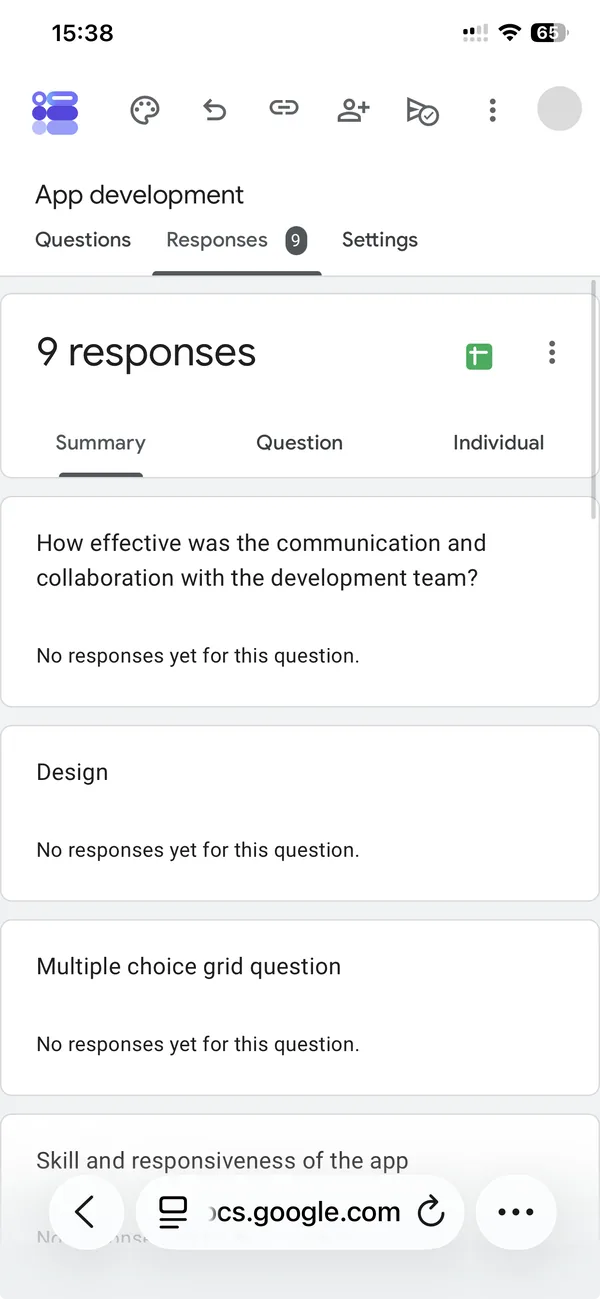
The green spreadsheet icon links the responses to a Google Sheet. On a phone with the Sheets app installed, tapping it hands you over to that app, and you come back to Safari with the small “back” link in the status bar. For a quick look, stay in the Responses tab; for anything more, wait until you are at a computer, or export.
Why I keep phone-built forms short
Everything above works, and I would do a five-question form on my phone without a second thought. What I would not do is a twenty-question form with sections that branch on answers. Not because it cannot be done, but because every extra card is another round of tap, type, dismiss keyboard, find the toolbar, and the “Go to section” menus are cramped at phone width. For those, write the questions in Notes first and paste them in, or build the skeleton on a computer and use the phone for edits.
There is one other way, which is the reason this site exists. Our app writes a Google Form for you from a one-line description: you type what the form is for, choose how many questions, and it creates a normal Google Form in your own Drive, with a QR code on the share screen. The form is then editable in Safari exactly as described above. It took me six minutes on the same afternoon, and none of them were spent typing questions. Creating and sharing forms with it is free; the app page has the details and the limits.
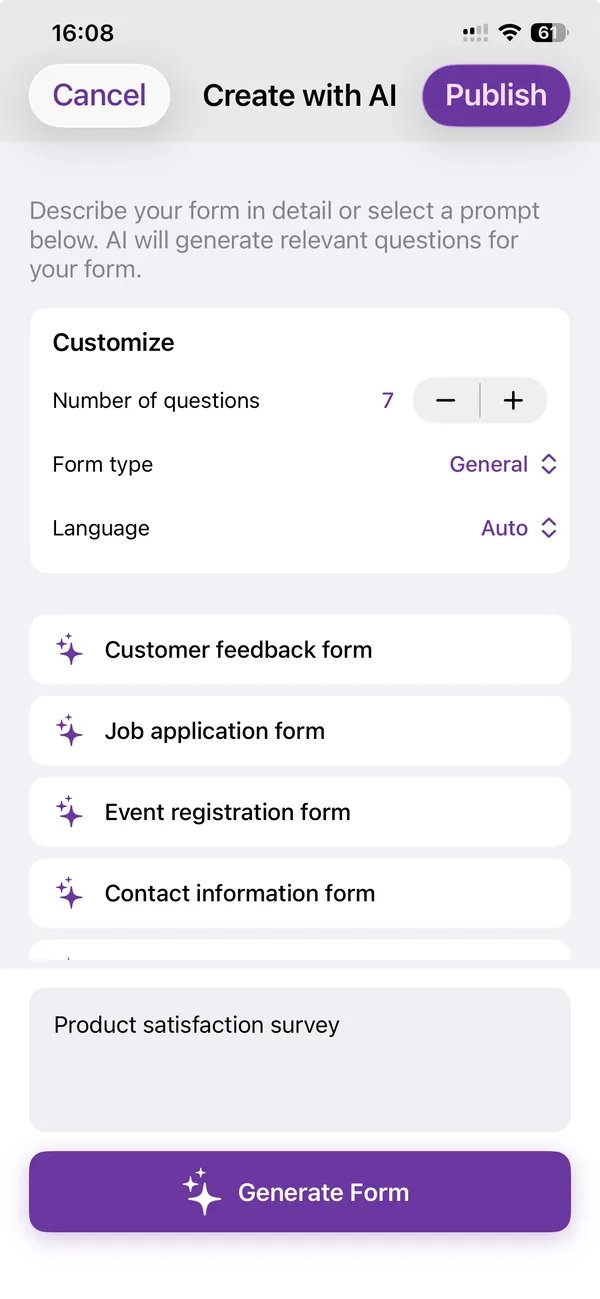
Build the form on the device you already have
Keep reading
Using Google Forms on a Phone: What Actually Works
I built, published and read a Google Form from an iPhone in Safari, screen by screen. What the mobile editor does well, the two things it does badly, and where an app changes the arithmetic.
Is There a Google Forms App for iPhone?
No, Google does not publish one. What works instead on an iPhone, compared honestly, including when the browser is the better answer.

Six Google Forms Settings Most People Never Switch On
Six settings that are already in Google Forms and rarely switched on, with the menu paths checked against Google’s documentation — and the one that will cost you responses.