How to Publish and Share a Google Form from the App
Yassine Jaa 5 minute read
A Google Form that nobody can reach is a document. This guide is the part between saving the form and the first response arriving: the share sheet of FormsGen version 2.0, on an iPhone, screen by screen, as of 20 September 2026. It assumes the form exists; if it does not yet, start with how to create a Google Form with AI in the app.
Four ways out of the sheet: a link, a fullscreen QR code, a social card image and a printable PDF. Which one you need depends on where the respondents are, and I go through that at the end.
Step 1: check the settings first
Before sharing anything, open the Settings tab in the editor. Three switches matter: “Accepting responses” must be on, or the link opens on a closed form; “Collect email addresses” forces respondents to sign in to Google, so leave it off for a public form; and “Limit to 1 response” does the same. Version 2.0 also lets you close the form automatically after a number of responses or on a date, from the same tab. Set it now if you need it: a poster with a QR code on it cannot be recalled, but a form that closes itself at 100 sign-ups does not need to be.
Step 2: open the share sheet
From My Forms, every form has a share icon on its row. From inside the editor, the same icon sits at the top, next to the print and design icons. Either opens the share sheet over the current screen, with the form name and its question count at the top so you know which form you are about to send.
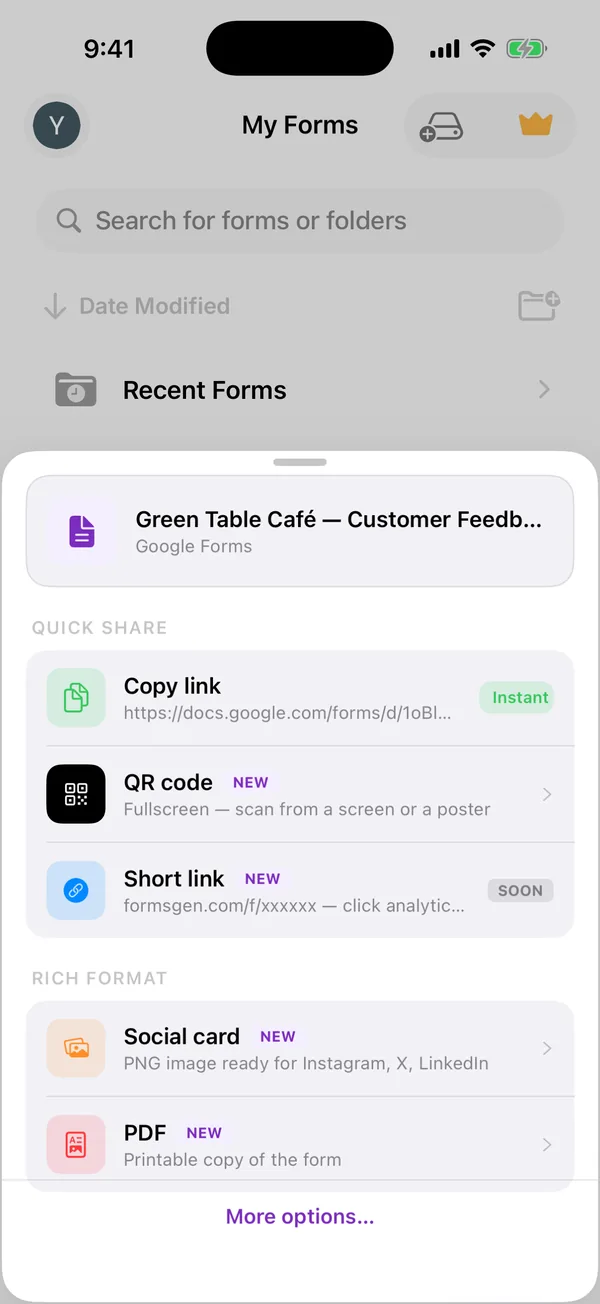
From the form list
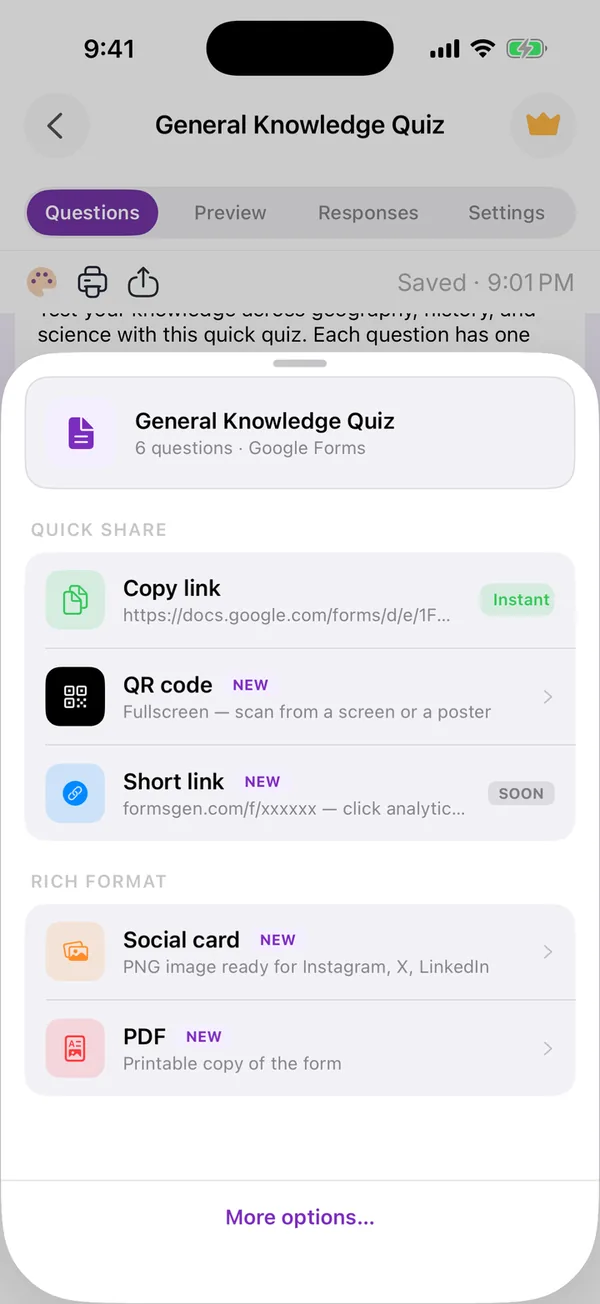
From inside the editor
The sheet is in two groups. Quick share: Copy link and QR code. Rich format: Social card and PDF. There is also a Short link row marked “soon”; it is not live in 2.0 and I do not describe it here.
Step 3: copy the link
Tap Copy link. The form’s own Google address, the docs.google.com/forms one, is on the clipboard, and the row says Instant because that is what it is: no server of ours is involved, the link comes from Google. Paste it into Messages, WhatsApp, an email, a Slack channel, a Teams post.
This is the option I use nine times out of ten. Respondents trust it. The address is visibly Google’s, and I have never had anyone ask what it was.
Step 4: show a QR code
Tap QR code and the code takes the whole screen, black background, the form name above it, “Scan to answer” as the instruction. The app raises the brightness on its own so the code scans in a dim room. Hold the phone up, or set it on the table at the door. I have done both.
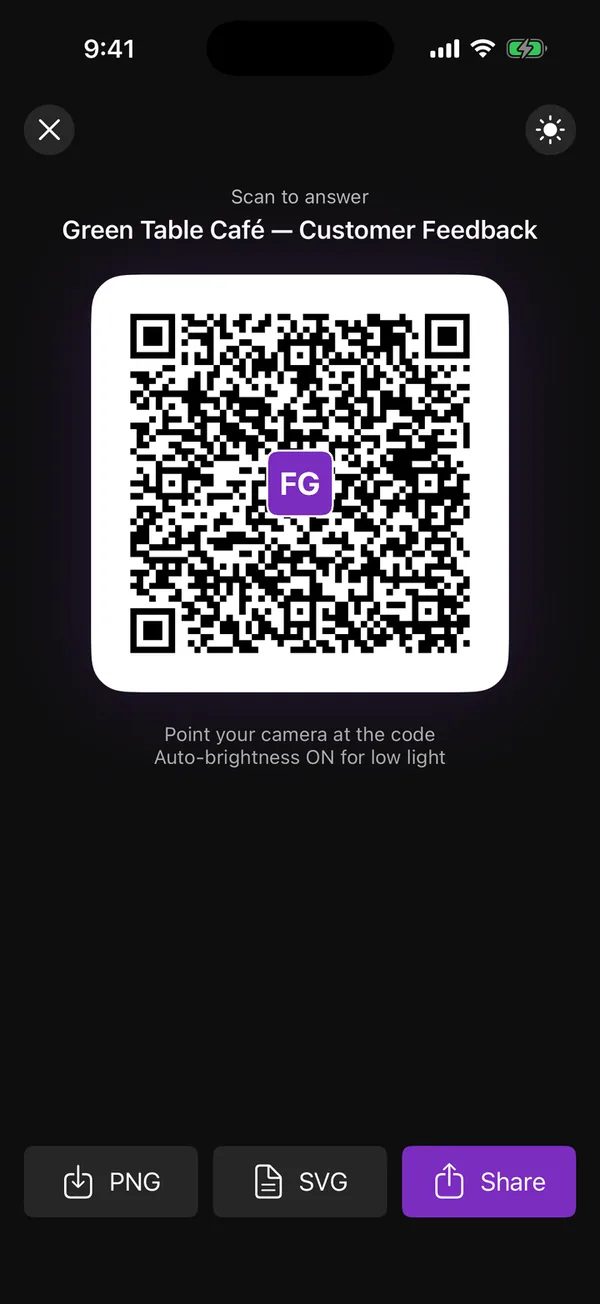
For anything printed, export instead of photographing the screen. PNG is right for a slide or a document; SVG is right for a poster or anything a printer will scale, because it stays sharp at any size. Share sends the image through the normal iOS share sheet to AirDrop, Mail or Files.
Google Forms itself has never offered a QR code, on any platform; this is the reason most people install the app. If you only need the code and not the app, the browser tool on this site makes one from any form link.
Step 5: make a social card
Tap Social card. The app draws a square image with the form name, its description and a QR code in the corner, in one of four styles: Gradient, Minimal, Dark or Vibrant. It is meant for Instagram, X, LinkedIn or a WhatsApp status, where a bare link gets no attention and an image with a scannable code does.
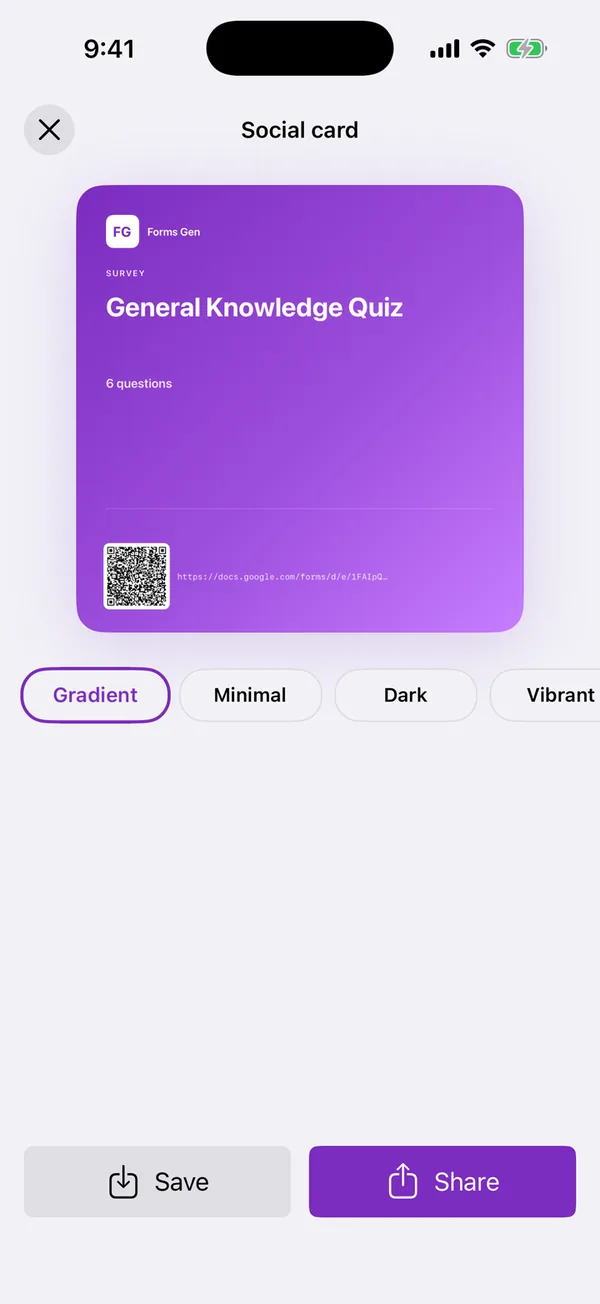
Save puts it in Photos; Share sends it straight to the app you post from. Post the link in the caption as well; some people will not scan.
Step 6: print it as a PDF
Tap PDF and the app lays the form out as a printable document: title, description, every question with its options and the spaces to answer. This is for the situation the paper scanner exists for in reverse: a workshop where half the room will fill it in on paper, a clinic waiting room, a stall with no signal. The PDF goes through the iOS share sheet to AirPrint, Files or Mail.
Answers on paper do not appear in your responses, obviously. Type them in afterwards, or photograph the filled sheets with the scanner.
Which one, for which situation
A group chat, an email list, an intranet: the link, nothing else. A room, an event, a counter, a poster: the QR code, printed as SVG if it is going on paper. A social account: the card, with the link in the caption. A place without phones or signal: the PDF.
Whatever you send, open the link yourself once first and answer the form. It takes a minute and it is the only test that catches a wrong setting from step 1 before your respondents do. Then go and read what comes back: how to read and analyse the responses in the app.
Build the form on the device you already have
Keep reading
How to Make a QR Code for a Google Form on Mobile
Google Forms does not make QR codes. Where the link hides on a phone, and three ways to turn it into a code without a laptop, with the one that encodes the wrong address.
How to See Google Forms Responses on Your Phone
Three ways to read the answers on a phone, tested in Safari, in the Sheets app and in a third-party app, with which one to use for a glance, for the file and for a real analysis.
Sharing a Google Form on a Phone: Link, QR Code, WhatsApp
Where the link hides in the mobile publish dialog, how to make the QR code Google Forms does not offer, and the two settings to check before the link leaves your phone.